
How to Plan Installation and Commissioning of Poultry House Equipment: From Site Readiness to First-Flock Support
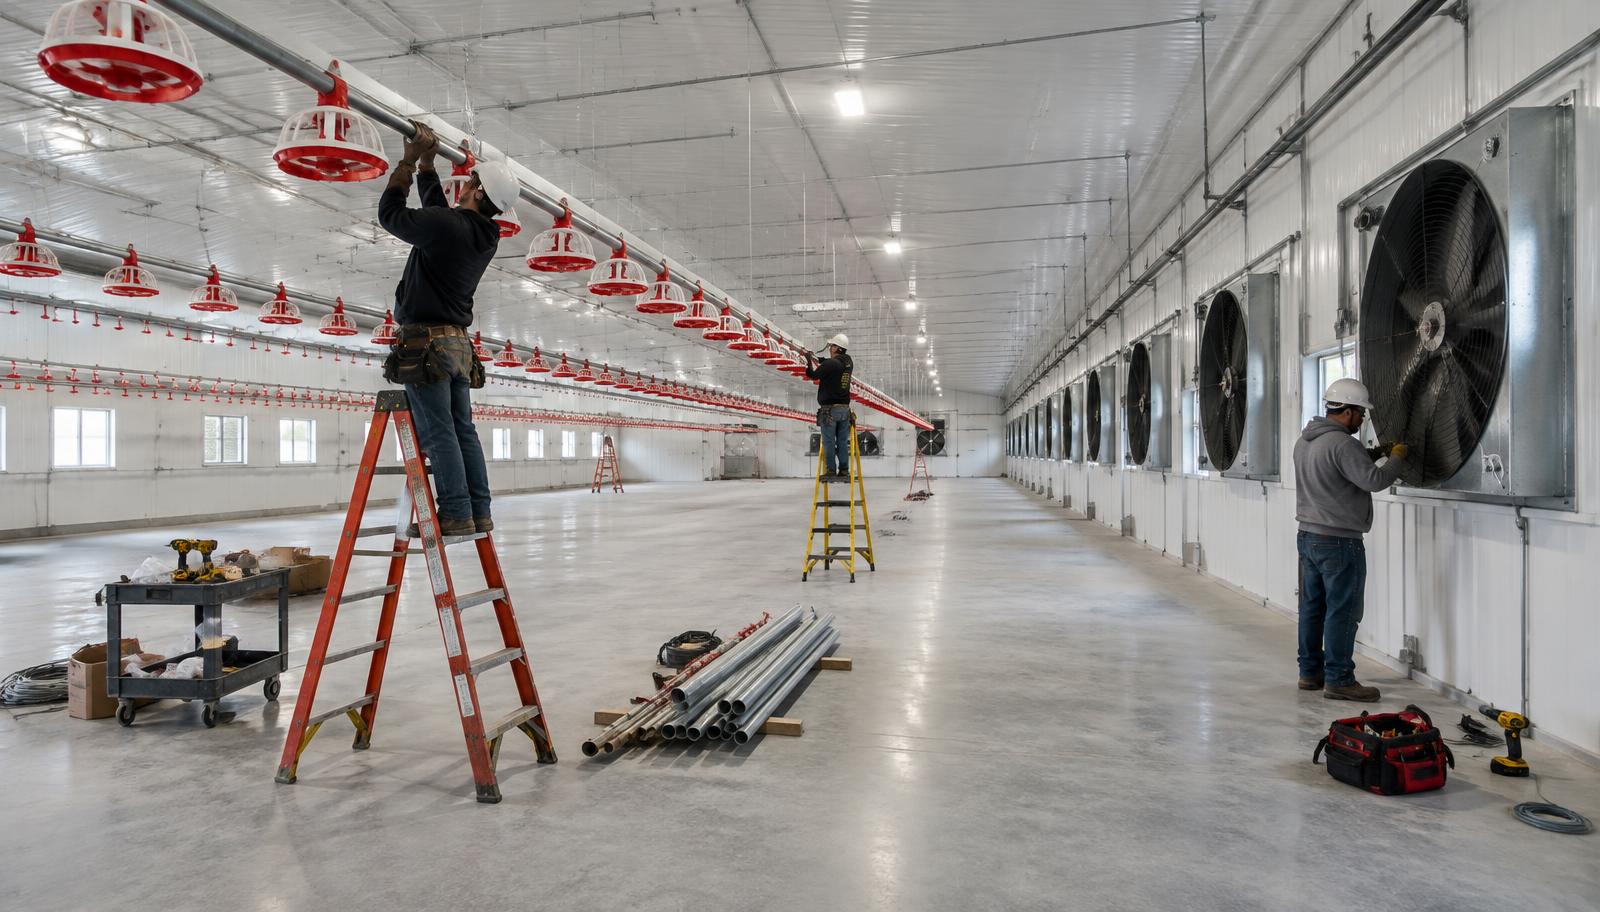
A step-by-step guide to planning the installation and commissioning of poultry house equipment, from site readiness and receiving through dry run, alarm and generator tests, and handover sign-off.
By HatchMatch Group Sourcing Desk · Last updated 2026-10-09
In short
Short answer. Plan installation and commissioning in a fixed sequence: confirm the site and building are ready to receive equipment, inspect and store deliveries correctly, define exactly who supervises installation and to what standard, complete electrical and water hookups and test them separately from the equipment, run a full dry run of every system together, test alarms and the backup generator under real failure conditions, verify ventilation static pressure at operating fan speeds, and only then sign a handover document listing what was tested, by whom and with what result. Build this sequence into the supply contract, not as an afterthought after equipment arrives.
Key takeaways
- Commercial poultry equipment is specified and quoted individually — ventilation, feeding, drinking, lighting, controllers, backup power — but it only performs as a system once installed and connected together.
- | Stage | What to check | Who typically signs off | |---|---|---| | Site readiness | Shell complete, floor cured, power and water roughed in, access clear | Civil contractor and project manager | | Receiving | Crates checked against packing list, damage noted before signing, correct storage | Site receiving team | | Installation | Equipment installed per drawings and manufacturer instructions | Installation supervisor named in contract | | Electrical hookup | Supply, panels, motor and controller wiring tested and certified | Qualified electrician | | Water hookup | Supply pressure, filtration, dosing and line pressure tested and flushed | Plumbing contractor or supplier technician | | Dry run | All systems run together 24–48 hours, stable behaviour observed | Supplier commissioning technician and project manager | | Alarm test | Each sensor type triggered, alert confirmed to reach every recipient | Controller supplier or installer | | Generator test | Simulated power cut, transfer switch and full load pickup confirmed | Generator supplier or electrician | | Static pressure | Measured by manometer at operating fan stages, compared to design | Ventilation supplier technician | | Handover | Signed checklist, as-built drawings, test records, manuals, warranty start date | Supplier and buyer, both signing |
- Does your quote include installation supervision, a full installation crew, or remote support only, and is this written into the contract?
- Treating commissioning as a formality completed in an hour rather than a structured sequence with written records.
- HatchMatch is a supplier-neutral procurement platform for commercial poultry projects, typically USD 250,000 and above.
Short answer. Plan installation and commissioning in a fixed sequence: confirm the site and building are ready to receive equipment, inspect and store deliveries correctly, define exactly who supervises installation and to what standard, complete electrical and water hookups and test them separately from the equipment, run a full dry run of every system together, test alarms and the backup generator under real failure conditions, verify ventilation static pressure at operating fan speeds, and only then sign a handover document listing what was tested, by whom and with what result. Build this sequence into the supply contract, not as an afterthought after equipment arrives.
This guide is for poultry project owners, project managers and engineers planning the installation and commissioning phase for a new or expanded commercial house. It assumes equipment has already been selected and ordered, and focuses on the period between delivery and placing the first flock — the phase where avoidable mistakes most often turn into weeks of delay or early flock problems.
Why installation and commissioning deserve their own plan
Commercial poultry equipment is specified and quoted individually — ventilation, feeding, drinking, lighting, controllers, backup power — but it only performs as a system once installed and connected together. A fan that passed factory tests can still fail to reach design static pressure if inlets are undersized or ductwork is wrong. A generator that runs fine on its own can still fail to pick up the load if the automatic transfer switch is not tested under an actual power cut. Commissioning is the stage where these system-level issues surface, and it is far cheaper to find them before birds arrive than during the first flock.
### 1. Confirm site and building readiness before equipment arrives
Want these figures for your own site, capacity and country? A HatchMatch specialist builds the budget with you — no buyer fees.
Start freeBefore any equipment is delivered, confirm the building shell is complete enough to receive it: roof and wall cladding finished and watertight, concrete floor cured and level, electrical rough-in and conduit runs in place, water supply piped to the house, and access routes wide enough for crates and lifting equipment. Agree a written readiness checklist with the civil contractor and the equipment supplier so neither side can dispute, after the fact, whether the site was ready on the delivery date.
### 2. Inspect and store deliveries correctly
At delivery, check crates against the packing list and note any damage or shortages on the delivery document before signing — this protects any later transport insurance or warranty claim. Store equipment under cover, off the ground, and away from moisture and extreme temperature until installation begins, following the supplier's storage instructions for sensitive items such as controllers, motors and electronic sensors. Items stored incorrectly for weeks before installation are a common and avoidable cause of early failures.
### 3. Define the installation supervision scope in writing
Decide, before installation starts, whether the supplier provides a full installation crew, a supervisor overseeing a local labour team, or remote support only, and put this in the contract rather than assuming it. If a supplier-appointed supervisor is used, define their scope precisely: which systems they check, what authority they have to stop work for incorrect installation, and whether their sign-off is a condition for the warranty to start. Vague supervision scope is one of the most common sources of dispute when something is installed incorrectly.
### 4. Complete and test electrical and water hookups separately
Electrical hookups — incoming supply, distribution panels, motor wiring, controller power and backup power transfer — should be tested and certified by a qualified electrician before equipment is energised, independent of the equipment supplier's own installation team where local regulation requires it. Water hookups — supply pressure, filtration, dosing and line pressure to drinker regulators — should likewise be pressure-tested and flushed before nipple lines are connected, so sediment and debris from the plumbing work does not enter the drinker system. Keep written test records for both.
### 5. Run a full dry run before placing birds
A dry run means operating every system together, without birds, for long enough to observe stable behaviour: ventilation cycling through stages, heating reaching and holding setpoint, lighting following its programmed schedule, feed and drinker lines running and winching correctly, and the controller logging and displaying readings as expected. Run the dry run for at least 24–48 hours where possible, so you catch intermittent faults that a short test misses.
### 6. Test alarms and the backup generator under real conditions
Alarm testing should include triggering each sensor type (high/low temperature, power failure, low water pressure, fan failure) to confirm the alert reaches every intended recipient — local siren, dialer, SMS or app notification — not just that the controller logs the event. Generator testing should include a real simulated power cut, not just a manual start, to confirm the automatic transfer switch picks up the full house load within the time the birds can safely go without ventilation; size the backup power using the poultry generator sizing calculator as a planning check against the installed unit.
### 7. Verify ventilation static pressure at operating fan speeds
Static pressure should be measured with a manometer at the fan stages the house will actually run at, not only at full speed, since inlet behaviour changes with fan speed and a system that passes at full speed can still be wrong at minimum ventilation. Compare the measured figures against the design values in the ventilation specification — see the ventilation calculator for planning figures — and have the installer adjust inlet opening or fan settings on the spot if readings are outside range, before signing off.
### 8. Complete sign-off and handover documentation
Handover should produce a written package, not a verbal confirmation: a signed commissioning checklist showing what was tested, by whom, on what date and with what result; as-built drawings or equipment layout if different from the original design; all test records (electrical, water, static pressure, alarm, generator); operating manuals and spare-parts lists; and the warranty start date, since many suppliers tie warranty start to commissioning sign-off rather than delivery date. Keep this package on file for the life of the equipment, not just the first flock.
### 9. Confirm first-flock support before placement
Ask what support is available during the first flock specifically — a supplier technician present at placement, a remote support contact for the first week, or a scheduled follow-up visit after a set number of days — since early problems are easier to correct with the installer still engaged than after they have left the site. Confirm this in writing before placement, not as a verbal promise.
Commissioning checklist and responsibility table
| Stage | What to check | Who typically signs off |
|---|---|---|
| Site readiness | Shell complete, floor cured, power and water roughed in, access clear | Civil contractor and project manager |
| Receiving | Crates checked against packing list, damage noted before signing, correct storage | Site receiving team |
| Installation | Equipment installed per drawings and manufacturer instructions | Installation supervisor named in contract |
| Electrical hookup | Supply, panels, motor and controller wiring tested and certified | Qualified electrician |
| Water hookup | Supply pressure, filtration, dosing and line pressure tested and flushed | Plumbing contractor or supplier technician |
| Dry run | All systems run together 24–48 hours, stable behaviour observed | Supplier commissioning technician and project manager |
| Alarm test | Each sensor type triggered, alert confirmed to reach every recipient | Controller supplier or installer |
| Generator test | Simulated power cut, transfer switch and full load pickup confirmed | Generator supplier or electrician |
| Static pressure | Measured by manometer at operating fan stages, compared to design | Ventilation supplier technician |
| Handover | Signed checklist, as-built drawings, test records, manuals, warranty start date | Supplier and buyer, both signing |
Questions to ask suppliers
Does your quote include installation supervision, a full installation crew, or remote support only, and is this written into the contract? Do you provide a written commissioning checklist, and does the buyer receive a copy with signatures? Is the warranty start date tied to delivery, installation completion or commissioning sign-off? Who performs the generator transfer-switch test, and is it a simulated power cut or a manual start only? Do you measure and report static pressure at operating fan stages, not only at full speed? What support is available during the first flock, and for how long after placement? Request written answers and compare them in one table before scoring price.
Common mistakes
Treating commissioning as a formality completed in an hour rather than a structured sequence with written records. Energising equipment before electrical and water hookups have been independently tested. Running a dry run for only a few hours, missing intermittent faults that a longer run would catch. Testing the generator with a manual start instead of a simulated power cut that proves the automatic transfer switch actually works. Measuring static pressure only at full fan speed and not at the minimum ventilation stage the house will run at most of the time. Accepting verbal handover instead of a signed document package, which makes later warranty disputes harder to resolve. And leaving first-flock support undefined until problems appear in week one.
Where HatchMatch fits
HatchMatch is a supplier-neutral procurement platform for commercial poultry projects, typically USD 250,000 and above. It is not a manufacturer, installer, EPC contractor, inspector, consultant, certification body or lender, and it does not sign supply contracts — buyers contract directly with the suppliers they choose. HatchMatch helps you turn your installation, commissioning and sign-off requirements into one written specification so offers can be compared line by line. Every brief receives human review, and HatchMatch aims to reply within two business days. To start, submit a poultry project request with your house dimensions, equipment scope, timeline and the installation and commissioning support you expect.
FAQ
What is the difference between installation and commissioning? Installation is physically fitting and connecting the equipment; commissioning is testing it, individually and as a system, against design values before birds are placed, and documenting the results.
When should the warranty period start? Confirm this in writing — many suppliers start the warranty at commissioning sign-off rather than at delivery date, which matters if installation is delayed.
How long should a dry run last? Where practical, run every system together for at least 24–48 hours before placement, long enough to reveal intermittent faults that a short test would miss.
Should static pressure be tested at full fan speed only? No — test at the fan stages the house will actually run at, including minimum ventilation, since inlet behaviour changes with fan speed.
What documents should be in the handover package? A signed commissioning checklist, as-built drawings if different from the design, all test records, operating manuals, spare-parts lists and the confirmed warranty start date.
Frequently asked questions
- Does your quote include installation supervision, a full installation crew, or remote support only, and is this written into the contract?
- Do you provide a written commissioning checklist, and does the buyer receive a copy with signatures? Is the warranty start date tied to delivery, installation completion or commissioning sign-off? Who performs the generator transfer-switch test, and is it a simulated power cut or a manual start only? Do you measure and report static pressure at operating fan stages, not only at full speed? What support is available during the first flock, and for how long after placement? Request written answers and compare them in one table before scoring price.
- What is the difference between installation and commissioning?
- Installation is physically fitting and connecting the equipment; commissioning is testing it, individually and as a system, against design values before birds are placed, and documenting the results.
- When should the warranty period start?
- Confirm this in writing — many suppliers start the warranty at commissioning sign-off rather than at delivery date, which matters if installation is delayed.
- How long should a dry run last?
- Where practical, run every system together for at least 24–48 hours before placement, long enough to reveal intermittent faults that a short test would miss.
- Should static pressure be tested at full fan speed only?
- No — test at the fan stages the house will actually run at, including minimum ventilation, since inlet behaviour changes with fan speed.
- What documents should be in the handover package?
- A signed commissioning checklist, as-built drawings if different from the design, all test records, operating manuals, spare-parts lists and the confirmed warranty start date.
More buyer questions are answered in our poultry procurement FAQ — also available in Español, Français, Português, Deutsch, العربية, Русский, Türkçe, Tiếng Việt.
From this article to a procurement-ready RFQ
HatchMatch Group is an independent sourcing desk — not a manufacturer or EPC contractor. These are the four steps we actually use with commercial poultry and hatchery buyers. If you are still deciding scope, start with what commercial poultry equipment includes and how suppliers are compared.
- 1. Plan the projectCapacity, climate and house layout in one guided workflowOpen
- 2. Build the RFQScope, specifications and comparable line itemsOpen
- 3. Submit the requestReviewed manually before any supplier introductionOpen
- 4. Track and compareFollow status and normalise supplier responsesOpen
Prefer the numbers first? Start with the poultry project cost calculator or browse the project planning guides.