
How to improve chick survival and flock uniformity in the first two weeks
This language edition is awaiting human editorial review.
Most first-week losses and uneven flocks trace back to a few controllable conditions: a house that was not pre-heated, cold floors, water and feed the chicks cannot reach, overcrowded brooding areas and nobody checking crop fill. Prepare the house before placement, measure temperature at chick height, make water and feed easy to find, and record observations every day so problems are caught while they can still be corrected.
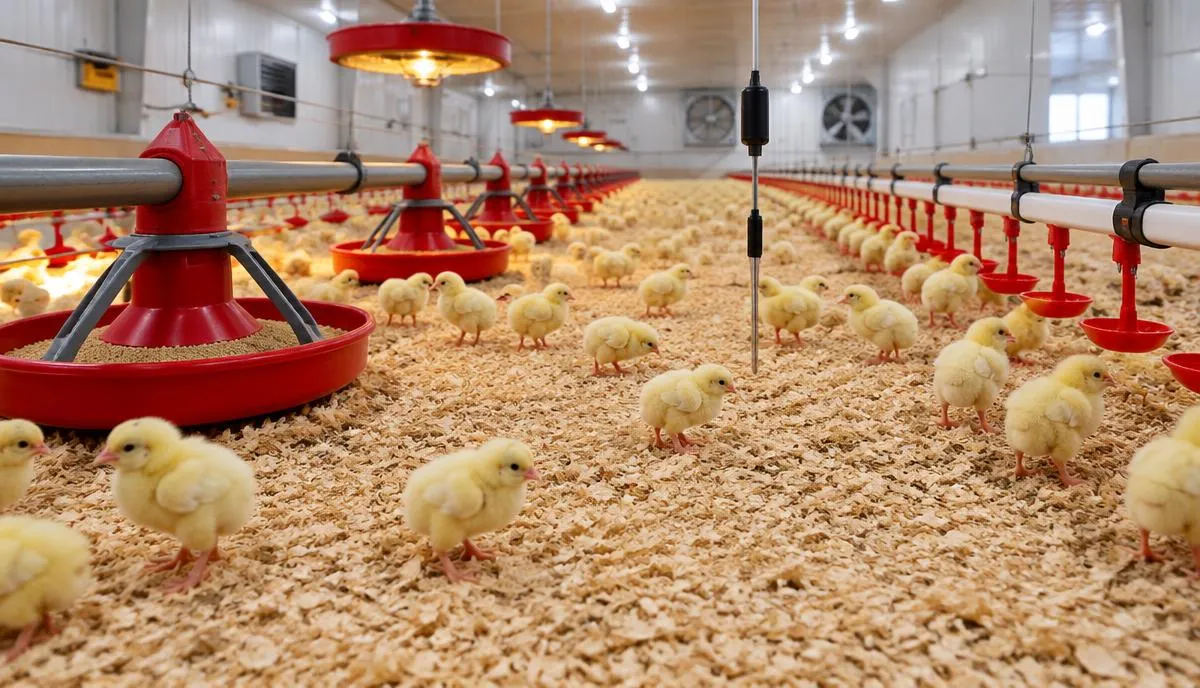
Why do the first 7–14 days decide flock results?
Young chicks cannot fully regulate their own body temperature, and their early feed and water intake shapes gut development and later growth. Delays at the start often show up weeks later as uneven weights, more culls and poorer feed conversion. Exact targets depend on the genetic line, so use the brooding recommendations of your breeder company and veterinarian as the reference.
How should the house be prepared before chick placement?
- Clean and dry: finish washing, disinfection and downtime according to your biosecurity plan, then let the house dry.
- Pre-heat in time: start heating early enough that the floor and litter, not only the air, reach the breeder's recommended range before chicks arrive.
- Litter: spread dry, even litter at a consistent depth; wet or packed patches create cold spots.
- Water lines: flush lines, check pressure and set drinker height for day-old chicks; confirm every nipple releases water.
- Feed: fill pans and add supplementary feeder paper or trays inside the brooding area.
- Ventilation: set minimum ventilation so air stays fresh without drafts at chick level.
What should you check in the first hours and days?
| Check | When | What to look for |
|---|---|---|
| Chick distribution | Every walk-through | Even spread; huddling suggests cold, panting or wings held out suggests heat, crowding on one side suggests drafts or light problems. |
| Crop fill | Hours after placement and next morning | Most chicks should have soft, filled crops; compare with your breeder's guidance. |
| Floor and air temperature | Several times a day | Measure at chick height in several zones, not only at the controller sensor. |
| Water availability | Daily | Line pressure, drinker height, leaks and wet litter under lines. |
| Mortality and culls | Daily | Record numbers and visible signs; a sudden rise needs veterinary attention. |
How do stocking density and space affect uniformity?
Crowded brooding areas make it harder for smaller chicks to reach feed and water, so differences grow over time. Plan the brooding area, feeder space and drinker access for the number placed, and expand the area as the birds grow according to the schedule agreed with your technical adviser. Local welfare rules may set maximum densities; check them before you design or expand a house.
How should you monitor and record uniformity?
- Weigh a representative sample from several zones of the house at fixed ages and record the average and the spread.
- Record house temperature, humidity, water use and feed delivered daily.
- Note any equipment fault, power cut or change of feed batch with the date.
- Compare the records with the breeder's reference curves and discuss deviations with your adviser.
Water use that drops suddenly is often one of the earliest warning signs worth investigating.
When should you call a veterinarian?
Call your flock veterinarian promptly if mortality rises suddenly, chicks show respiratory signs, lameness, diarrhea or unusual behaviour, or if feed and water intake fall without an obvious equipment cause. Do not start medication or change vaccination programmes on your own. In many countries some diseases must be reported to the animal-health authority.
Brooding readiness checklist
- Cleaning, disinfection and downtime completed and recorded
- Floor and litter temperature measured at chick height before placement
- Water lines flushed, pressure set, drinker height adjusted
- Feed available in pans and on supplementary paper or trays
- Minimum ventilation running without drafts
- Alarm and back-up power tested
- Daily record sheet ready: mortality, culls, water, feed, temperature
Results vary by breed or genetic line, age, climate, housing system and local rules. Use this guide for planning and discussion with your veterinarian, integrator or technical adviser, not as a diagnosis or a performance promise.
Frequently asked questions
What brooding temperature should I use?
Use the range recommended by your breeder company for the genetic line and age, and check it at chick height. Chick behaviour is the practical confirmation: even spread means the conditions are usually right.
Why is my flock uneven after the first week?
Common causes include cold zones, delayed access to water or feed, overcrowded brooding areas and differences in chick quality. Records of temperature, crop fill and weights by zone help find the cause.
Is first-week mortality always a health problem?
Not always. House conditions and chick quality play a large role, but a sudden rise or abnormal signs need a veterinarian to investigate.
Do I need new brooding equipment to improve results?
Often the first gains come from preparation and monitoring. If records show the heating, drinkers or controls cannot hold conditions, then compare equipment against a written specification.
Sources
- Penn State Extension — Poultry nutrition and feeding
- University of Minnesota Extension — Preventing heat stress in poultry
- USDA APHIS — Defend the Flock: biosecurity basics
- MSD Veterinary Manual — Poultry
- FAO — Poultry production and products
Sources checked: 2026-10-13
Knowledge Center · Email updates
Get updates
Choose the reading that matters to your project.
Email subscriptions are not available yet.