
How to Inspect Poultry Equipment Before Shipment: A Step-by-Step Pre-Shipment Inspection Checklist
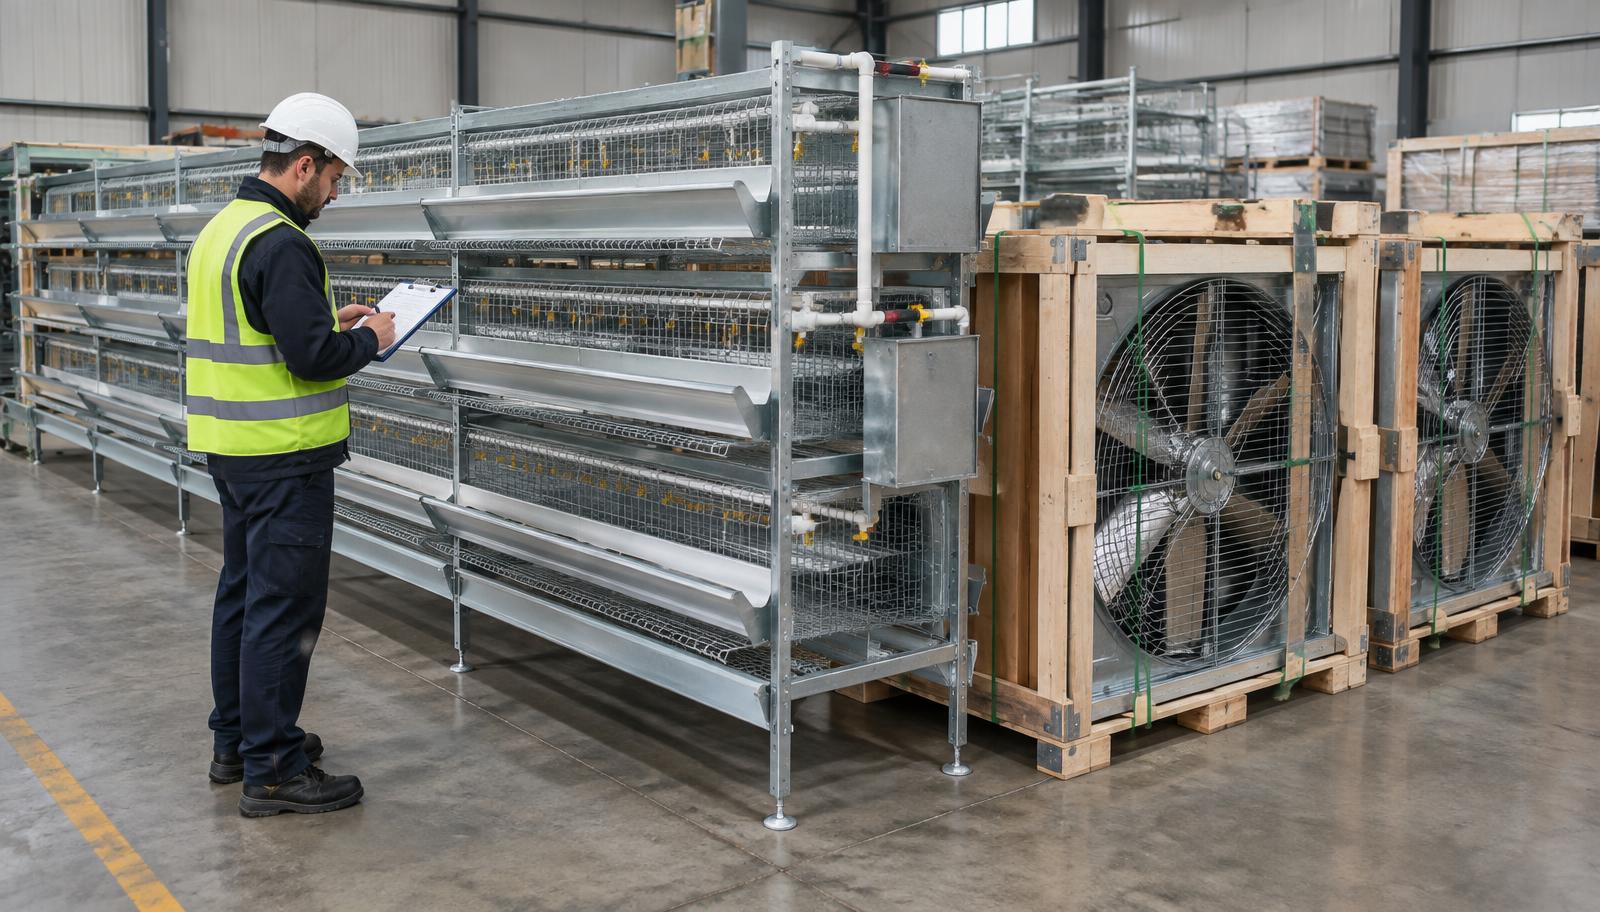
A step-by-step guide to pre-shipment inspection of poultry equipment: what to check against the specification, who should check it, and how to document the result before the container is sealed.
By HatchMatch Group Sourcing Desk · Last updated 2026-10-09
In short
Short answer. Before any poultry equipment leaves the factory, check it against your written specification and purchase order: packing list quantities, galvanizing and finish, motor and controller nameplates against the agreed voltage and frequency, a live controller test, spare parts included, export-grade packing and marking, and dated, labelled photos of everything above. The buyer either travels to do this personally, appoints an independent third-party inspector, or — for smaller or lower-risk lines — accepts supplier-provided photos and test videos against the same checklist.
Key takeaways
- Once equipment is loaded into a container and the vessel sails, correcting a wrong voltage, a missing part, or a finish that will rust in six months becomes far slower and more expensive than catching it at the factory gate.
- | Approach | When it fits | What it covers | |---|---|---| | Buyer travels personally | High-value or first order with a new supplier, nearby factory | Full hands-on check against the specification, direct supplier relationship | | Independent third-party inspector appointed by the buyer | Most commercial orders, especially overseas suppliers | Checklist-based inspection, written report, photos and video, no supplier conflict of interest | | Supplier-provided photos and video against the buyer's checklist | Smaller or lower-risk line items, repeat orders with a proven supplier | Lower cost, faster, but relies on supplier self-reporting against the agreed checklist |
- Can you confirm a shipment-ready date and hold the container until our inspection is signed off?
- Scheduling the inspection after the container is already loaded and sealed, so any finding means unpacking and repacking rather than a same-day fix.
- HatchMatch is a supplier-neutral procurement platform for commercial poultry projects, typically USD 250,000 and above.
Short answer. Before any poultry equipment leaves the factory, check it against your written specification and purchase order: packing list quantities, galvanizing and finish, motor and controller nameplates against the agreed voltage and frequency, a live controller test, spare parts included, export-grade packing and marking, and dated, labelled photos of everything above. The buyer either travels to do this personally, appoints an independent third-party inspector, or — for smaller or lower-risk lines — accepts supplier-provided photos and test videos against the same checklist. It should always happen before the goods are loaded, not after.
This guide is for poultry investors, integrators and project teams who have placed an order and are approaching the agreed shipment date. It assumes a written specification and purchase order already exist — if they do not, start by fixing those, because a pre-shipment inspection can only check equipment against a document, not against memory or email threads.
Why pre-shipment inspection exists
Once equipment is loaded into a container and the vessel sails, correcting a wrong voltage, a missing part, or a finish that will rust in six months becomes far slower and more expensive than catching it at the factory gate. A pre-shipment inspection is the last point where a buyer, or someone acting for the buyer, can compare physical goods against the paper specification while the supplier can still open a crate, swap a part or repack something, before freight, customs and distance make any correction a formal claim instead of a same-day fix.
### 1. Confirm the inspection happens before loading, not after
Want these figures for your own site, capacity and country? A HatchMatch specialist builds the budget with you — no buyer fees.
Start freeAgree the inspection date in writing as soon as the supplier gives a shipment-ready date, and make clear in the purchase order that goods are not to be sealed into containers until the inspection is signed off. An inspection carried out after the container is already loaded and sealed defeats its own purpose, since unpacking and repacking a sealed container is itself a cost and delay the inspection was meant to avoid.
### 2. Check the packing list against the specification and purchase order, line by line
Lay the supplier's packing list next to your original specification and purchase order and confirm every line item, model number, quantity and dimension matches — not just the total weight or crate count. Pay particular attention to quantities of smaller components (nipples, bolts, sensors, control boards) that are easy to under-ship without the total crate count changing noticeably.
### 3. Inspect galvanizing and surface finish
For galvanized steel structure, cages, feed lines or ductwork, check that galvanizing is even and continuous, with no bare or thinly coated spots, especially at welds and cut edges where galvanizing is hardest to apply correctly. Ask for the galvanizing method (hot-dip vs electro-galvanized) and coating thickness to be stated in the specification beforehand, since this determines expected service life in the humid, corrosive environment typical of poultry houses, and is very hard to argue about after the equipment is installed and rusting.
### 4. Read motor and controller nameplates against the agreed voltage and frequency
Physically read the nameplate on every motor, fan and major electrical component and confirm voltage, frequency (50 Hz vs 60 Hz) and phase match what was specified for your country's electrical supply — a mismatch here is one of the most common and most costly pre-shipment findings, since a motor built for the wrong voltage or frequency may run at the wrong speed, overheat, or fail outright on site. Cross-check nameplate data against the specification sheet, not against what the supplier says verbally.
### 5. Run a live controller and equipment test
Have the supplier power up the environmental controller, feed or drinker line motors, fans and any automated doors or winches, and run through their basic functions on camera or in person: alarms triggering, setpoints being accepted, motors starting and stopping cleanly, and sensors reading plausible values. A controller that will not complete this basic test in the factory is very unlikely to perform better after a sea voyage and installation in the field.
### 6. Verify spare parts, tools and documentation are included
Check that the spare parts list agreed in the purchase order — commonly including motors, fan blades, belts, sensors, control boards and fasteners for the first one to two years of operation — is physically present, correctly labelled, and separately packed and marked so it is identifiable on arrival rather than mixed into general crates. Confirm operating manuals, wiring diagrams, warranty documents and spare-parts lists are included in the shipment, in a language your operating team can use.
### 7. Check export packing and marking
Confirm equipment is packed to withstand sea or air freight handling: adequate crating or palletizing, moisture protection for electronics and controllers, corner protection for galvanized panels, and clear external marking showing contents, handling instructions (fragile, this way up), destination and purchase order or container reference. Poor export packing is a common cause of damage that shows up only after unloading, when it is much harder to attribute responsibility.
### 8. Take dated, labelled photographs and video of every checkpoint
Photograph and, where useful, video every item above — packing list comparison, galvanizing close-ups, nameplates, the controller test in progress, spare parts laid out, and the final packed and marked crates — with date stamps and clear labelling of which line item each image shows. This record is what makes a later claim possible if a discrepancy is found after arrival that was not visible or was misrepresented at inspection.
Who should carry out the inspection
| Approach | When it fits | What it covers |
|---|---|---|
| Buyer travels personally | High-value or first order with a new supplier, nearby factory | Full hands-on check against the specification, direct supplier relationship |
| Independent third-party inspector appointed by the buyer | Most commercial orders, especially overseas suppliers | Checklist-based inspection, written report, photos and video, no supplier conflict of interest |
| Supplier-provided photos and video against the buyer's checklist | Smaller or lower-risk line items, repeat orders with a proven supplier | Lower cost, faster, but relies on supplier self-reporting against the agreed checklist |
Whichever approach is used, the inspection should be checked against the buyer's own written checklist and specification, not against a generic form the supplier supplies — and the independent inspector, when appointed, should be contracted and paid by the buyer, not the supplier, to avoid any conflict of interest.
Questions to ask suppliers
Can you confirm a shipment-ready date and hold the container until our inspection is signed off? Will you provide nameplate photos for every motor and controller before the inspection date? Can the controller and motors be powered up and demonstrated at the factory on the day of inspection? What is your standard export packing specification, and can you share photos of a similar past shipment? Will the spare-parts package be separately labelled and listed on the packing list? Do you accept an independent third-party inspector appointed and paid by us? Request written answers before the shipment-ready date so there are no surprises on inspection day.
Common mistakes
Scheduling the inspection after the container is already loaded and sealed, so any finding means unpacking and repacking rather than a same-day fix. Checking the packing list total weight or crate count instead of line-by-line quantities and model numbers. Trusting a supplier's verbal confirmation of voltage and frequency instead of reading the nameplate against the written specification. Skipping the live controller test because the paperwork and visual inspection look fine. Treating spare parts as a formality rather than physically counting and identifying them. And relying only on the supplier's own photos for a first order with a new, unverified factory instead of appointing an independent inspector the buyer controls.
Where HatchMatch fits
HatchMatch is a supplier-neutral procurement platform for commercial poultry projects, typically USD 250,000 and above. It is not a manufacturer, installer, EPC contractor, inspector, consultant, certification body or lender, and it does not sign supply contracts or perform inspections — buyers contract directly with the suppliers and, if they choose, the independent inspectors they appoint. HatchMatch helps you turn your requirements into one written specification so offers, and later the pre-shipment inspection against that specification, can be compared line by line. Every brief receives human review, and HatchMatch aims to reply within two business days. To start, submit a poultry project request with your equipment list, target specification and shipment timeline.
FAQ
Who pays for a pre-shipment inspection? When the buyer appoints an independent third-party inspector, the buyer typically pays that inspector directly, which keeps the inspection free of conflict of interest; some buyers negotiate cost-sharing with the supplier in the purchase order, but the appointment itself should remain the buyer's choice.
Can the supplier do the inspection themselves? A supplier can provide photos and test videos against the buyer's checklist for lower-risk or repeat orders, but for first orders or high-value shipments an independent inspector appointed by the buyer, or the buyer travelling personally, gives a more reliable result.
What is the single most common pre-shipment finding? Voltage, frequency or phase mismatches between the motor or controller nameplate and the buyer's electrical supply are among the most frequent and most costly findings, which is why reading the nameplate physically against the specification is a non-negotiable step.
Should the inspection happen before or after the container is loaded? Always before loading and sealing. An inspection carried out after the container is sealed removes the ability to fix a finding on the spot and turns every issue into a formal claim.
What documents should the inspection confirm are included? Operating manuals, wiring diagrams, warranty documents and the agreed spare-parts list, in a language the operating team can use, packed and marked so they are easy to find on arrival.
Frequently asked questions
- Can you confirm a shipment-ready date and hold the container until our inspection is signed off?
- Will you provide nameplate photos for every motor and controller before the inspection date? Can the controller and motors be powered up and demonstrated at the factory on the day of inspection? What is your standard export packing specification, and can you share photos of a similar past shipment? Will the spare-parts package be separately labelled and listed on the packing list? Do you accept an independent third-party inspector appointed and paid by us? Request written answers before the shipment-ready date so there are no surprises on inspection day.
- Who pays for a pre-shipment inspection?
- When the buyer appoints an independent third-party inspector, the buyer typically pays that inspector directly, which keeps the inspection free of conflict of interest; some buyers negotiate cost-sharing with the supplier in the purchase order, but the appointment itself should remain the buyer's choice.
- Can the supplier do the inspection themselves?
- A supplier can provide photos and test videos against the buyer's checklist for lower-risk or repeat orders, but for first orders or high-value shipments an independent inspector appointed by the buyer, or the buyer travelling personally, gives a more reliable result.
- What is the single most common pre-shipment finding?
- Voltage, frequency or phase mismatches between the motor or controller nameplate and the buyer's electrical supply are among the most frequent and most costly findings, which is why reading the nameplate physically against the specification is a non-negotiable step.
- Should the inspection happen before or after the container is loaded?
- Always before loading and sealing. An inspection carried out after the container is sealed removes the ability to fix a finding on the spot and turns every issue into a formal claim.
- What documents should the inspection confirm are included?
- Operating manuals, wiring diagrams, warranty documents and the agreed spare-parts list, in a language the operating team can use, packed and marked so they are easy to find on arrival.
More buyer questions are answered in our poultry procurement FAQ — also available in Español, Français, Português, Deutsch, العربية, Русский, Türkçe, Tiếng Việt.
From this article to a procurement-ready RFQ
HatchMatch Group is an independent sourcing desk — not a manufacturer or EPC contractor. These are the four steps we actually use with commercial poultry and hatchery buyers. If you are still deciding scope, start with what commercial poultry equipment includes and how suppliers are compared.
- 1. Plan the projectCapacity, climate and house layout in one guided workflowOpen
- 2. Build the RFQScope, specifications and comparable line itemsOpen
- 3. Submit the requestReviewed manually before any supplier introductionOpen
- 4. Track and compareFollow status and normalise supplier responsesOpen
Prefer the numbers first? Start with the poultry project cost calculator or browse the project planning guides.